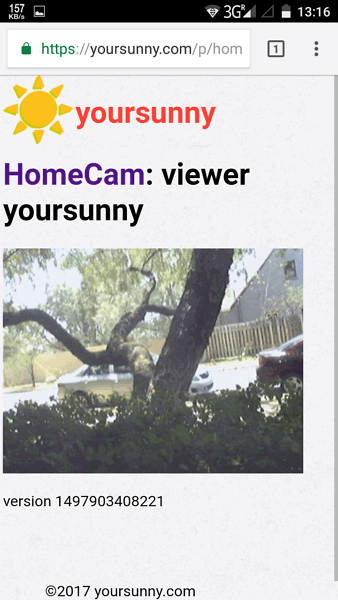
HomeCam, a browser-based home surveillance camera, is one of my major side projects during the past few years. HomeCam allows you to capture pictures via the webcam on a laptop or smartphone, and view real-time images from a different device. No specialized hardware or software installation is needed: HomeCam works directly in a web browser. This article gives an overview of the web technologies that enable HomeCam.
If you have not used HomeCam, try it today!
Functionality Review and General Workflow
The HomeCam web app can operate in either viewer or camera mode. To enter either mode, the user is required to specify a "camera name", which serves as an identifier. Each camera should have a distinct camera name. Any number of viewers can be active at the same time, and they will retrieve real-time pictures from the camera with the same camera name.
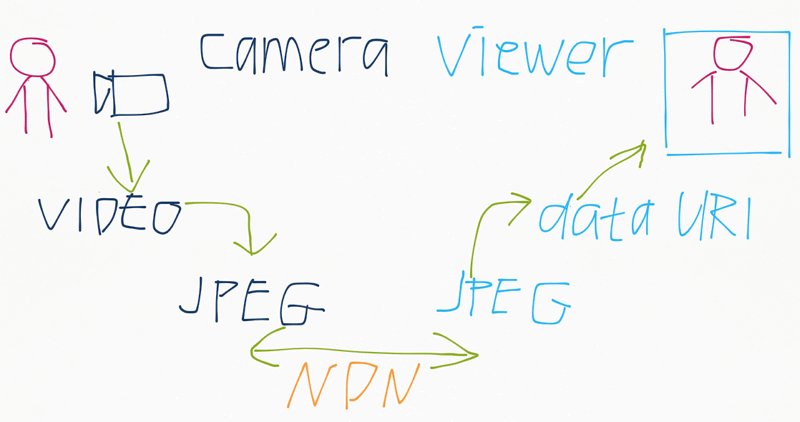
Under the hood, this works in three steps:
- The camera web app captures pictures from the webcam.
- Pictures are delivered from camera to viewers via Named Data Networking (NDN).
- The viewer web app displays retrieved images.

I will then explain how each step works. If you wish to see the source code, sure because yoursunny.com is on git, so the code is over there.
Capture Webcam Images via MediaDevices API
MediaDevices API, commonly known as getUserMedia, is the standard way for getting access to cameras and other media input devices from a web app.
It is implemented in most modern desktop and mobile browsers, with notable exception of iOS < 11.
The camera web app uses navigator.mediaDevices.getUserMedia function to capture from a webcam.

The media data captured is a video stream. While showing video to the viewers is fantastic, I have not figured out how to extract video data out of the APIs so that it can be delivered over NDN, so HomeCam is currently limited to capturing and delivering still images. To turn the video stream into still pictures:
- Locally display the video stream in a
<video>element. - Draw a frame of the video into a
<canvas>element. - Invoke
canvas.toDataURIto obtain a still picture in PNG or JPEG format.
Deliver Pictures via Named Data Networking
Named Data Networking (NDN) is a future Internet architecture I've been working on during the past few years. While my primary involvement in NDN is designing its lower layer protocols, I started HomeCam as a side project to gain experience on the application layer development of NDN.
NDN is a receiver-driven architecture, which means the camera cannot actively push a picture to the viewers. Instead, the viewer web app must send an Interest, which is forwarded to the camera web app through NDN routers (after the camera completes its prefix registration). Only upon receiving an Interest, the camera web app can respond with a Data packet that contains a picture.
For efficient use of network resources, NDN has limited the maximum size of Data packets to 8800 octets, in which about 800 are taken by header fields, leaving 8000 bytes available for the payload. While taking the picture in lower resolution, encoding it as JPEG, and specifying a lower JPEG quality helps reducing the size of a picture, each picture often exceeds 8000 bytes. To solve this problem, each picture is broken into multiple Data packets, called segments, so that none of them would exceed the packet size limit. Since NDN protocol allows only one Data in response to each Interest, consequently, the viewer must send multiple Interests in order to retrieve all the segments to reconstruct a whole picture.
A unique benefit of delivering pictures using NDN is scalability. NDN routers are able to aggregate Interests from multiple viewers when they are requesting images from the same camera, and forward only one copy of the Interest to the camera. Then, the camera just needs to send the picture once, and the network would take care of disseminating the picture to every viewer. This significantly reduces the bandwidth and CPU usage of the camera web app, when there are multiple viewer present.
Display Pictures using Data URIs
After retrieving the Data packets and reconstructing their payloads into the original JPEG picture, it's time for the viewer web app to display it!
The <img> element is the standard way to display a JPEG image, and it normally requires a web address to download the picture from, but what if the image bytes is already downloaded in a JavaScript object?
The solution is to use Data URIs.
Although data: URIs are designed for embedding small files inline in HTML documents, it works fine with pictures weighing tens of kilobytes, and is good enough for my purpose.

As soon as a picture is displayed, the viewer web app would start to retrieve the next picture after a half-second delay.
Encrypt with SubtleCrypto
Apart from the main functionality, HomeCam supports encrypting the pictures while in transit. When this feature is turned on, the same encryption key must be supplied to both the camera and the viewer. The "encryption key" (password) is used to derive an AES key. And then, each picture is encrypted before encoding into NDN Data packets, and decrypted before displaying.
HomeCam incorporates SubtleCrypto API to perform AES encryption and decryption.
SubtleCrypto provides fast symmetric and asymmetric encryption in browser.
Unlikely third-party encryption libraries such as crypto-js (which are harmful by the way), crypto.subtle is fast and secure because it is implemented in native code as part of the browser.