yoursunny.com is in Git and Completely Rebuilt

I started making websites since 2001. This website, yoursunny.com, started in 2006. In the past 11 years, I've rebuilt the site several times, switched from ASP to PHP, and moved from Windows dedicated hosting to shared hosting and eventually to Linux VPS. So far, every time I want to perform a major edit to the website, I copy original versions of affected files to a backup folder on my computer, and then go ahead to do the edit. After having tested the modification locally, I upload changed files via FTP or SFTP to the server. One constant worry over my head is, what if I lose all the files on my computer, and my hosting provider vanishes so I can't get them back? Another headache is, sometimes I may make an edit incorrectly, but I couldn't revert it back because I didn't copy the original files to the backup folder as I determined the change wasn't "major" enough to warrant a backup.

During my studies at University of Arizona, I learned a useful tool called git. Git is a source control system: it allows developers to create a repository and put source code into the repository, and will automatically keep track of all the edits applied to each file. By putting website source code into a git repository, I can find out what modifications I've performed to each file over time, regardless of whether it is "major" or "minor". Additionally, I can synchronize the git repository with a remote git server, so that the server has a copy of my website, including edit histories as well. This would solve both the worry of losing files, and the headache of not having an earlier version to revert to in case of an incorrect modification.

After delaying this projects several times, I am finally determined to move yoursunny.com into git repositories in Apr 2017. At the same time, to keep the website source code as clean as possible, I decide to try out two new technologies: static site generators and Composer. That is, I would rebuild yoursunny.com, copying page by page, into a new website stored in git repositories.

I spent about 2 months for this rebuild/move, and I'm happy to announce that yoursunny.com is now under source control.

Main Site with Composer

How to Access Gogo Inflight WiFi on American Airlines for Free?

Gogo offers WiFi Internet access on American Airlines domestic flights within United States. The Internet services are provided through Air-To-Ground (ATG) technology: a cellular radio network of over 200 towers in North America points their antennas to the sky; a Gogo-equipped airliner connects to one of these cellular towers, and provides Internet to passengers via WiFi. Pricing for Internet access via Gogo in-flight WiFi starts at USD 4.95 for 30 minutes.

gogoinflight airborne splash page

American Airlines and Gogo also provide inflight personal device entertainment through the same gogoinflight Wi-Fi signal. This service is free of charge, and allows passengers to watch movies and TV episodes on their own smartphones and tablets. Presumably, contents are pre-downloaded to a server located inside the aircraft, and therefore accessing those contents do not consume radio bandwidth.

Rogue One: A Star Wars Story movie provided on gogoinflight

While watching videos are permitted during the flight, Gogo does not want passengers to download these copyrighted movies for watching later at home. Therefore, users must have the Gogo Entertainment app on their mobile devices in order to watch movies. The app is compatible with the Digital Rights Management technology used in the entertainment server, to ensure that the movies can be watched for free, but cannot be (easily) downloaded. But what if the device does not already have the Gogo Entertainment app?

reboot-into.sh: Fast Operating System Switch for BerryBoot

BerryBoot is a bootloader for Raspberry Pi, allowing multiple operating system images to be placed on a single microSD card. It displays a menu upon system boot, so that the user can choose which OS to load.

I use a Raspberry Pi 3 as my primary desktop computer. It loads Ubuntu Mate 16.04 by default, in which I can code, read, and write dissertation. The same computer is also equipped with RetroPie, as my gaming machine playing FreeDoom.

One problem I'm frequently facing is: in order to switch from work mode to game mode, I must reboot the machine. Shutting down Ubuntu Mate can take as little as 10 seconds, or as much as 3 minutes, depending on luck. I hate to stay with the machine while it's rebooting, but if I walk away, I may miss the 10-second window in which I should select RetroPie from the BerryBoot menu, before it loads the default, Ubuntu Mate, automatically.

A less known feature of BerryBoot is its runonce file. You may instruct BerryBoot to load a specific image at next boot by writing the image name to data/runonce file in BerryBoot partition. This works particularly well if the Raspberry Pi is headless and does not have a keyboard, but it requires 5 steps and requires typing the full image name in the runonce file.

To simplify this process and quickly switch to another operating system in BerryBoot, I wrote a little script:

"freewifi" via ESP8266 Captive Portal

Many outdoor places do not have permanent Wi-Fi access points. Occasionally I can get a weak unencrypted WiFi signal from a nearby shop; otherwise, I'll have to face the fact of not having WiFi, and resort to my slow and expensive SIM card for cellular Internet access.

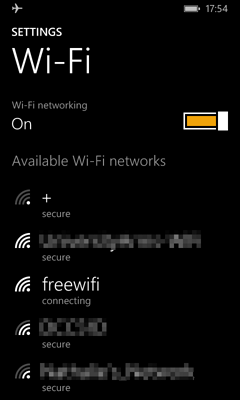
Since I learned that the ESP8266 can serve as a WiFi hotspot, I got an idea. I can make an ESP8266 appear as a Wi-Fi access point (AP), and provide free WiFi to everyone at the outdoor venue. Except that, this is a freewifi prank: I am providing free WiFi, but my WiFi does not offer Internet access.

Screenshots

ESP8266 makes a freewifi WiFi access point SSID:

freewifi SSID

Install OpenConnect VPN Server with Trusted Certificate from Let's Encrypt

OpenConnect VPN server, or ocserv, is an SSL VPN server compatible with Cisco AnyConnect. It can easily be installed in a cheap OpenVZ Virtual Private Server (VPS) with TUN capability. However, most online tutorials for installing OpenConnect VPN server rely on certtool to generate a self-signed certificate via OpenSSL. Afterwards, since the self-signed certificate is not trusted by operating systems, either the VPN client must be configured to skip certificate checking, or the self-signed certificate must be imported as a trusted certificate on the VPN client machine. Both practices are insecure. Bypassing certificate checking would allow an attacker to impose as the VPN server. Importing a trusted certificate does not seem wrong at first, but in case the private key is compromised, an attacker would be able to impose as any server to the client, including online shopping and bank websites, using a certificate signed by that private key. Remember that the self-signed certificate's private key is stored on the VPS filesystem, it is much less secure than Hardware Security Modules used at real CAs to store private keys, and therefore it is a bad idea to trust such certificates in client machines.

Let's Encrypt is a free, automated, and open Certificate Authority (CA). It allows anyone to obtain a domain-verified certificate within minutes, and without paying anything. Certificates from Let's Encrypt are trusted by most modern operating systems. They are ideal for securing an OpenConnect VPN server.

This article explains how to request a proper trusted certificate from Let's Encrypt for use with ocserv, how to install OpenConnect VPN Server and use the Let's Encrypt certificate, and how to configure Cisco AnyConnect client to connect to ocserv. These steps are verified with an OpenVZ Ubuntu 16.04 64bit VPS provided by SecureDragon. It is required to enable TUN devices for the VPS, typically through a button in SolusVM or other control panel provided by the hosting company.

Request Let's Encrypt Certificate for OpenConnect VPN Server

Before requesting a certificate from Let's Encrypt, you must have a Virtual Private Server with an IPv4 address, and have a domain name (could be subdomain) resolved to the server so that you are able to ping the server via the domain name.

ndnping Jewelry on ESP8266

I was wearing a unique piece of jewelry at NDN community meeting, Mar 2017: a pair of ESP8266 units that communicate with each other over the NDN testbed. They are ugly, but it is a nice way to demonstrate my creation in a Named Data Networking community meeting.

Two Witty Cloud boards are tied to my wrists, and powered by a USB powerbank in my pocket. One of them runs a ndnping client, and the other runs a ndnping server. The client sends Interests to a router in Arizona, the Interests (under a multicast prefix) are flooded through the testbed, and reach the server which is connected to a router in Memphis.

Arduino Code

Library: esp8266ndn

Count-Up Timer on ESP8266 and I2C LCD

I need a count-up timer on the desk so that I can do a presentation without turning my head to the wall clock. So I wrote one with ESP8266 and I2C-connected LCD unit.

photo of LCD count-up timer using ESP8266

#include <LiquidCrystal_I2C.h>

LiquidCrystal_I2C lcd(0x3F, 16, 2);

void
setup()
{
  lcd.begin(16, 2);
  lcd.init();
  lcd.backlight();
}

void
loop()
{
  int seconds = millis() / 1000;
  int minutes = seconds / 60;
  seconds %= 60;

  lcd.clear();
  lcd.print(minutes);
  lcd.print(':');
  if (seconds < 10) {
    lcd.print('0');
  }
  lcd.print(seconds);
  delay(100);
}

Hardware is Losant LCD Kit. I'm using Marco Schwartz's LiquidCrystal_I2C library.

Repost Twitter to Facebook through Losant and IFTTT

Twitter and Facebook are two primary social networks that I regularly use. Despite many arguments against synchronizing contents across different accounts, I still think it's beneficial to repost my tweets onto my Facebook timeline. There are already many solutions to achieve cross-posting between Twitter and Facebook, but they are not ideal, because I'm very picky on what I want:

  • I want to cross-post from Twitter to Facebook, not the other way around.
  • I want to tweet with native Twitter clients, not through a third party website or app.
  • I don't want those tweets created by my Swarm check-ins to be re-posted onto Facebook, because Swarm app can directly post to Facebook.
  • For plain text tweets, I want them as plain text Facebook status updates, without a link to Twitter which could only confuse my Facebook friends.
  • If I tweet a photo, I want that photo to be uploaded to Facebook, instead of posting a link on Facebook.
  • If I tweet a link to some webpage, I want Facebook to display a preview of the webpage.

IFTTT is one of my favorite online services. It allows me to create a recipe for certain automated actions. The name "IFTTT" stands for IF This Than That, where This could be "posting a new tweet", and That could be "posting a Facebook status". However, IFTTT does not allow filtering: I couldn't specify conditions like "the tweet is not posted by Swarm", which is necessary to achieve my goals. Therefore, I need a more advance solution to repost my Twitter feed to Facebook.

This year the world is greeted with Losant, an Internet of Things platform that allows makers to connect their sensor devices, collect data into the cloud, and take actions through workflow execution. While neither Twitter nor Facebook has anything to do with IoT, Losant workflow has some great capabilities that makes it suitable for non-IoT usage:

  • trigger execution from a timer or an HTTP request
  • parse and stringify JSON
  • send HTTP request to any server
  • store execute state in a variable
  • most importantly, execute raw JavaScript!

Issue Your Own NDN Certificates

UPDATE 2021-06-03: NDN certificate format changed since ndn-cxx 0.5.0. Certificate names in this article are following a previous version of certificate format specification. Nevertheless, the basic concepts are still applicable.

To publish contents into a Named Data Networking (NDN) backbone network, you need to connect your NFD end host to the NDN Testbed, run a local producer application, and let the world reach your NFD through Automatic Prefix Propagation. However, a limitation with NDN Forwarding Daemon (NFD)'s Automatic Prefix Propagation is that, the prefix registered toward your end host is always the identity name of your certificate. While this works fine when you only have one or two machines, two problems arise when you want to deploy multiple end hosts:

  • Every certificate request needs an email verification and manual approval process, which is inconvenient. Or, you can copy your certificate and private key onto every machine, but in case any of these machines is compromised, your one and only private key will be exposed.
  • Certificates requested with the same email address have the same "identity name" and hence Automatic Prefix Propagation would register the same prefix. Unless all your machines serve the same contents, registering the same prefix toward all machines hurts network performance because the router has to rely on flooding and probing to figure out which of your machines serves a certain piece of content.

The solution is to issue your own NDN certificates, and let the world trust them.

The Hierarchical Trust Model

Access C.H.I.P UART Wirelessly with ESP8266

A year ago, a Kickstarter campaign CHIP - The World's First Nine Dollar Computer caught my attention: it's a $9 computer smaller than a banana. Unlike the Raspberry Pi, it comes with onboard storage so I don't need to buy a separate SD card, it has WiFi instead of wired Ethernet so I don't have to run wires everywhere, and it is compatible with my existing VGA monitor through a $10 adaptor so I don't have to buy another HDMI monitor. Therefore, I snagged two of these little computers along with one VGA adapter during the campaign.

During the whole year of waiting, Next Thing Co sent me regular email updates on the development progress, with each email ending with mmmtc (much much more to come) and a lot of hearts. NTC also clarified that C.H.I.P is strictly B.Y.O.B. Finally, my pair of CHIPs and a VGA DIP arrived in my mailbox on Jun 16. An hour later, yoursunny.com homepage is displayed on its Debian desktop.

A few more hours later, I start to discover a limitation of C.H.I.P software: The Linux kernel comes with CHIP operating system has very limited features.

$ sudo modprobe fuse
modprobe: FATAL: Module fuse not found.

Obviously, the solution to this problem is to compile my own Linux kernel with more features. The compilation can be done on the C.H.I.P itself. I managed to do that when the CHIP is powered by a 5V 1A phone charger plus a 1500mAh LiPo battery. I had the compilation running under screen(1) and attended to it intermittently, and it finished in a day.